Gary’s Blog

Recipe: Bourbon Fudge

Recipe for Bourbon Fudge


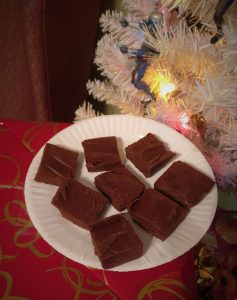
While I love bourbon balls, the time and effort they require left me looking for an alternative to getting my bourbon & chocolate fix on.  This recipes nails that.  Typically takes less than 30 minutes to make, couple hours to set (I often let set overnight), and you’re ready to cut.  Significantly less effort, but just as delicious!

Ingredients
10 oz semisweet chocolate
10 oz dark chocolate
1/4 cup of bourbon*
1/2 tsp vanilla extract
14 oz of condensed milk (1 can)
1/4 cup butter (softened)
1/4 tsp salt
Coarse salt for topping (if desired)

* As to the choice of bourbon, the flavor here carries through more than the bourbon balls for whatever reason.  I like to use something around 100 proof, like Jim Beam Distiller’s cut or any bottled-in-bond.

1. Grease (or spray with non-stick cooking spray) an 8×8 pan or a 9×13 pan, depending upon if you want more (but less thick) pieces or not (I tend to go with the 9×13 myself).  Line the pan with parchment paper, pushing the paper down so it sticks as much as possible (it won’t fill the corners neatly, that’s OK).

2.  Melt the chocolate in a double boiler, stirring until it is smooth and completely melted.  Add the butter and condensed milk, continuing to stir and fold until it is well integrated (usually a couple of minutes).  It will become very thick!  Turn off the heat.

3.  Pour in the bourbon, vanilla extract, and salt, stirring until it is mixed well.  Once mixed, pour into the paper-lined pan.  If you want to top with salt (I use coarse kosher salt usually), sprinkle a little of that over the top.

4.  Place pan in the fridge to let set, typically a couple of hours (but can be left overnight).

5. When ready to cut, remove pan and turn it upside down over a cutting board.  Gently pull on the outer edges of the parchment paper to free the fudge.  Using a large knife, cut into desired size chunks (I usually go with about a 1 inch square).  The outer edges tend to taper off, so I’ll usually set those aside (nothing wrong with them, but I prefer to set out for serving the squares, and eat the edges myself later!)

When searching for a bourbon fudge recipe, they seemed to run the gambit.  Not being a professional or experienced candy maker, I wanted to avoid those that got really technical (the minute they mention “softball”, they lost me).  Honestly, this one looked like one of the easiest, so I decided to try it first, and I haven’t tried any of the more challenging ones.

I’ve tried different chocolates (100% dark, using milk chocolate rather than semisweet, etc), but really like this 50/50 ratio.  I have also tried peanut butter chips – and that was a fail (for whatever reason, it wasn’t as firm, and the bourbon flavor was just lost; the result wasn’t a total waste if you like peanut butter fudge, but not nearly as good).  I’ve also tried adjusting the ratios a bit (adding more chocolate and more bourbon), but hadn’t found that to be better either.  Now a nice twist is to substitute Grand Marnier in place of the bourbon and orange extract in place of the vanilla extract (if you like that sorta thing).

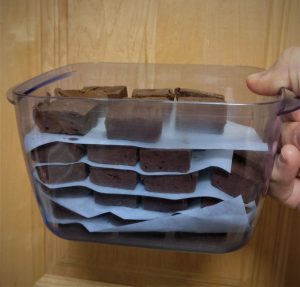
Also like the bourbon balls, the end result gets better over time.  Give them a week or two (or three) in the fridge, and the bourbon flavor really intensifies.  If you’ve got folks who really like bourbon, I’d plan ahead and do these 2 weeks ahead of time.  Now on a plate these take up a lot of space, but here’s a storage tip: parchment paper and stacking (see photo below).

Cheers!
Gary

Recipe: Bourbon Fudge Read More »

Recipe: Bourbon Balls

Recipe for Bourbon Balls

I absolutely love bourbon balls!  They are a bit of work, and being a two day affair require some advanced planning.  Because of that, I often make a double-batch (winding up with closer to 60) and just make them once a year around the holidays.  The bourbon flavor also intensifies with age (you can absolutely eat them the day of, but they’ll be much better two weeks later).

Ingredients

1 cup of crushed pecans
Package of pecan halves (12 oz)
5-8 tablespoons of bourbon*
1/2 cup butter (softened)
16 oz powdered sugar (plus a bit extra)
10 oz semisweet chocolate
10 oz dark chocolate
Toothpicks (ok – less ingredient than tool, but make sure you’ve got them on-hand!

* As to the choice of bourbon, for years I used Old Grand-Dad 114, as I wanted a higher proof and intense flavor. I’ve used Evan Williams bottled-in-bond, and can’t say I could tell a big difference. My recommendation: use whatever you’ve got and that you enjoy drinking, but don’t waste your expensive stuff. If you keep Evan Williams black label laying around, I’m sure that will do just fine.

1. Fill a small jar with crushed pecans, leaving a bit of room at the top. Pour bourbon over until the pecan pieces are completely covered. Seal jar and allow to soak at a MINIMUM overnight, but ideally a week or more (honestly, I’ve left a jar like this for over a year with no ill effects; not that they soak up much more after the first few days, but simply for convenience).

2. Mix the butter and sugar thoroughly. Strain the soaked pecans (the bourbon can be saved for the next round!) and stir the pecans into the butter/sugar mixture. It should be slightly stiff; if it is overly wet – add in more powdered sugar.

3. Using a spoon, scoop out a small amount (like a quarter-diameter in size) and form into a ball. Insert a toothpick about half-way into the ball (NOT through it), and set in a tray (I use a 8 x 13 cake pan) with toothpick at a bit of an angle (just so you can cover the tray later). Repeat with the rest of the mixture (will make about 25 balls, give/take based on the size). Cover tray and refrigerate overnight.

4. Setup a double-boiler and melt both chocolates in the top. Line a cookie sheet with waxed paper. Go through the package of pecan halves and select the best (complete ‘halves’), setting aside 25 (or however many balls your formed, plus a couple extra in case of breakage) on a plate near the tray.  Broken pecan halves can be set aside and later crushed (and soaked in bourbon for the next batch; one reason mine wind up soaking for a year! This is where any bourbon strained from the soaking nuts can be used again too!)

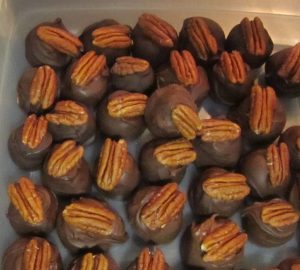
5. Remove the balls from the refrigerator, setting near (but not next to) the double-boiler. Using the toothpick, remove one ball at a time, submerge completely (but quickly) in the chocolate to coat, turning the ball while the excess falls away. Set onto the wax paper covered tray, and try to work the toothpick loose (sometimes a turn or two will do the trick; if not, use a pecan halve to hold the ball while gently pulling the toothpick out). Place a pecan halve over the top where the toothpick was. Repeat with the remainder of the balls. Note that as the chocolate volume in the double-boiler is reduced, you may need a spatula to work the chocolate around the balls to cover them.

6. Store the bourbon balls on a tray in the refrigerator until the chocolate hardens (usually an hour or so). Store in a container in the refrigerator until serving.

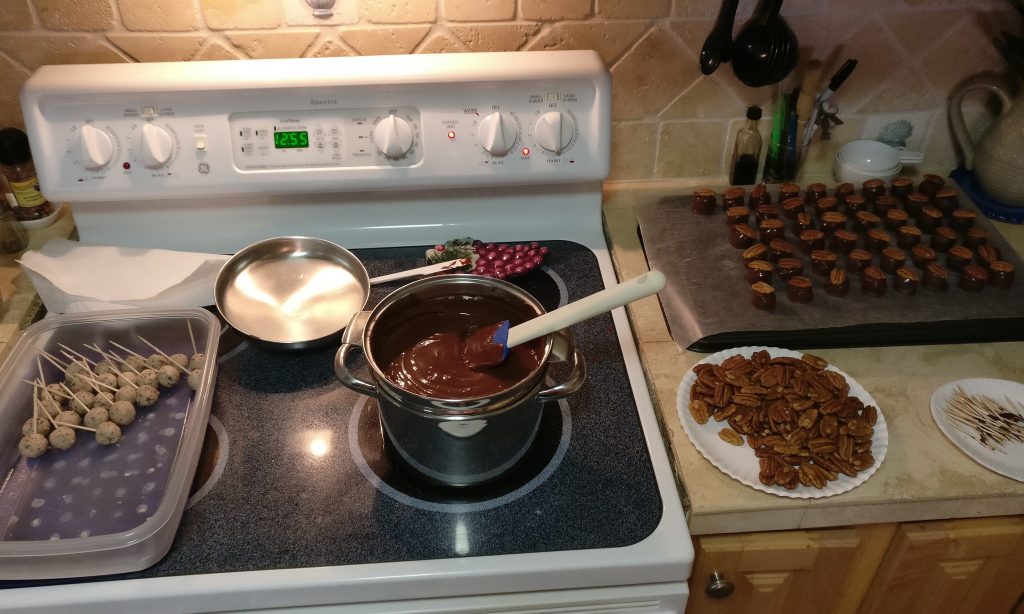
Below is an image showing (a double-batch) in production.  Another tip I learned is to put a couple of cookie sheets into the freezer the night before, and rotate them (being cool helps keep the chocolate from spreading too far when they’re placed on the wax paper).

Like most recipes, I borrowed from various sources and have tweaked it.  If you’re not a fan of dark chocolate, just use all semisweet.  Or if you’re a big fan of dark chocolate, use all of that.  I like the 50/50 mix.  I’ve tried peanut butter chips, but wasn’t as happy with that (the balls didn’t harden in the same way, and they melted more easily).  I’ve also tried rye whiskey rather than bourbon, thinking that might bring a nice spicy kick to the party.  It didn’t (they weren’t “bad”, but bourbon and chocolate just have this synergy for some reason; Alton Brown could probably explain it).  Most importantly, enjoy!

Cheers!
Gary

Recipe: Bourbon Balls Read More »

Other Memories of Ireland

I had the pleasure of spending just over two weeks in Ireland in early August 2018. This was a father/son trip where we used a company (Trafalgar) that took care of everything.  We added a few days to meet distant relatives – but this wasn’t specifically a whiskey-focused trip.  Thankfully my old man is also a whiskey enthusiast, so we managed to squeeze in a couple distillery tours/tastings that I’ve shared.  We also used our free time in various cities to sneak in some other whiskey themed stops.

Here are some of those highlights from trip.

Dublin
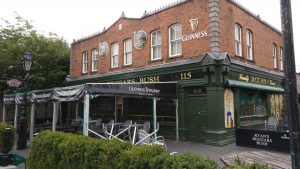
Most Memorable Pub: Ryan’s Beggars Bush

Ryans Beggars Bush
This hidden gem was a block from our hotel.  I spotted it while out for an early morning walk, and took note of the little sign off the lamppost: Jack Ryan Single Malt Irish Whiskey.  I returned that evening and was not disappointed.  I did try their own single malt (distilled by Cooley, aged 12 yrs) and it wasn’t in my wheelhouse, but not off-putting either.  What really blew me away is the ambiance (although I think if I would have used that term in there, someone would have laughed me out of the pub).  Just a very relaxed, easy going atmosphere.  Met a chap named James who gave me some of the history, and while not perhaps a PC term – I thought he nailed the essence of this place when he said it was one of the “last but best old-man pubs around”.  Good natured ribbing (note – asking to have Tennis put on when the World Cup Final is being televised might not earn you many friends; besides James), great service (when James noted that around the other side of the bar they had a more extensive whiskey selection, our bartender Anton was happy to have me come around their side to see for myself – and they were right!), and just a lot of fun.  Enjoyed a few drams, and then a couple of pints of Guiness, and thought that if this place were a block or two from my house – I could easily picture that being a regular stop.  Highly recommend if you’re in town (although if there’s a game at nearby Aviva Stadium, expect it to be hectic!)  Better whiskey prices than other pubs in the area, and a top notch atmosphere.

Belfast
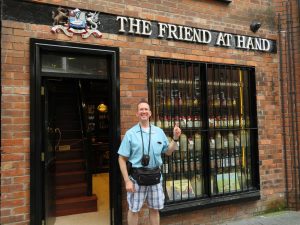
Most Memorable Shop: The Friend At Hand
The Friend At Hand

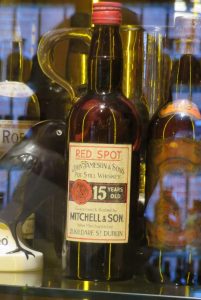
We only had 40 minutes of “free time” in Belfast, and spent nearly all of it talking with Rob in one of the neatest whiskey shops I’d ever set foot it! It is more museum than shop (I believe he said they have more bottles NOT for sale than are for sale), but that was what I found so fascinating about it. I bought a 50mL of their own label, which was Bushmill’s distilled single malt aged 13 yrs in bourbon cask (again, wasn’t right in my wheelhouse, but nothing off-putting), and took a ton of pictures. They have ancient dusty bottles most had never heard of, and Rob was very well informed about any we asked about.  They have one of the last remaining unopened bottles of Red Spot, a 15 yr Irish whiskey (of course in the “Not for Sale” case).

While Irish whiskey focused, there were some very rare bottles of scotch (although there was some connection with Ireland involved typically).  We saw some shops with a greater “for sale” selection, but I think we had more fun in this shop than any others.  I’d definitely check it out if in the area (and carve out more time!)

Ballybofey and Stranorlar
Most Memorable Pub: The Snug Bar (on Main St, next to the Kee’s Hotel).

We spent two nights in Stranolar, and the first we stuck with the pub in the Kee’s Hotel (which was also pretty decent; live entertainment both nights we were there which was appreciated!) The second we decided to pop next door after hearing someone mention a quiet little pub with a great atmosphere. We were early (like – first ones/only ones in the door), but weren’t disappointed. For a small pub, they had an extensive Irish whiskey collection (and a better than average collection of bourbon and scotch as well!), and had a printed drinks menu which made browsing easier. While they cater to the whiskey enthusiast, they had a fine selection of beer and other drinks for the masses. The bartender (who may also have been the owner) was well versed in whiskey, and a serious enthusiast himself. He shared some details of his personal collection which I’ll respect his privacy to not divulge here, but it was impressive. Most importantly, he was willing to sit and chat with patrons about our shared love of the amber spirit, which is all one can hope in a lovely setting such as that!

Killarney
Most Memorable Bar: Celtic Whiskey Bar & Larder

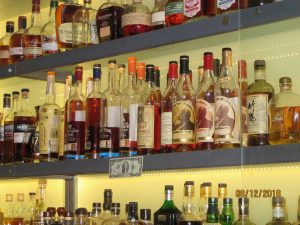
This is hardly a ‘hidden gem’. I mean – just Google ‘Killarney Whiskey’ and their “Irish Whiskey Experience” web page is the first result – and for good reason. We didn’t have time to experience that unfortunately, but their on-line whiskey menu floored me! Pappy, BTAC, and the various American limited editions that are near impossible to get today were available, and at prices that aren’t outrageous (one example – William Larue Weller was 22 euro for a 35.5 mL pour; I won’t quote local prices – but that’s damned reasonable!) I figured they were on the menu, but not behind the bar – but they were (we didn’t do a complete inventory, but here’s a snapshot my Dad took of that section).
Celtic Whiskey Bar
If you’ve read about the distillery tours, you’re familiar with my quest to find a bottle and my criteria (if not, check those posts). I asked for a manager and explained what I was looking for in broad strokes. Frances went out of her way to bring me various options, including the details on each bottle. I ordered a pour of two, and while both were very nice, I didn’t absolutely love either one – so I thanked her for her help. We arrived early (about 5pm) and enjoyed an excellent meal before this. When we arrived, there were a couple of patrons in the bar area. When we left around 7pm, it was packed – every seat at the bar or every table was taken. I wish I had a day to spend, as they also offer different whiskey flights. While I didn’t find a bottle, I had a great time and would definitely return if in Killarney.

Sláinte!
Gary

Other Memories of Ireland Read More »

Teeling Whiskey Distillery Tour & Tasting

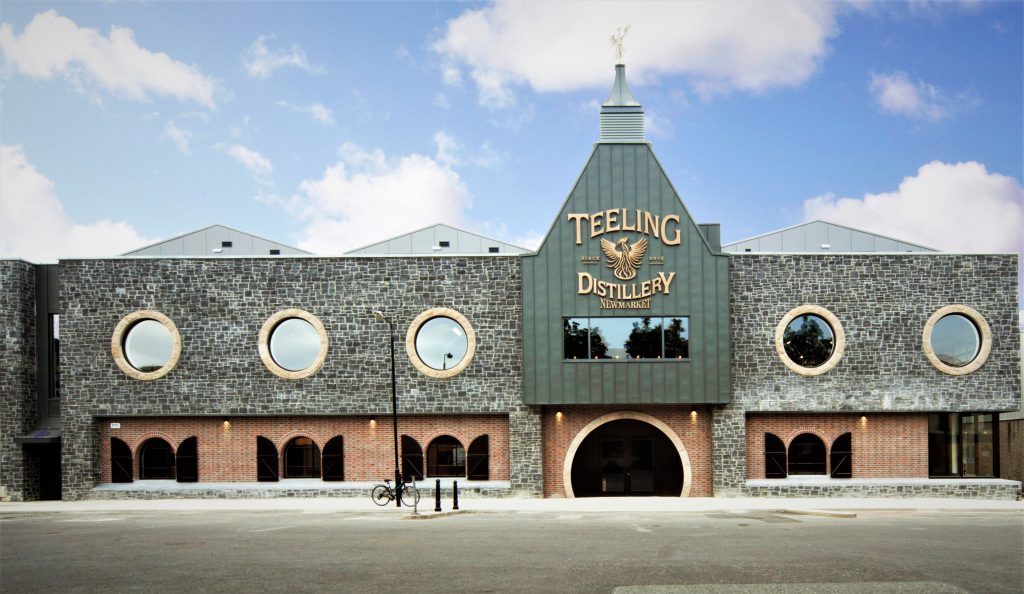
The other whiskey tour we managed to squeeze into our non-whiskey themed Ireland trip was at Teeling Whiskey Distillery, which opened in 2015.  The tours include a tasting, and they have different offerings which was nice (same tour, but more/better whiskey tasting at the end if you’re interested).  As the tour is the same for all, let’s cover that first.

Before the tour starts, they have a nice exhibition space setup. It covers some facts about the distillery (how many visitors, pours served, etc), and provides a nice historical timeline about Irish whiskey in Dublin, as well as the Teeling history.
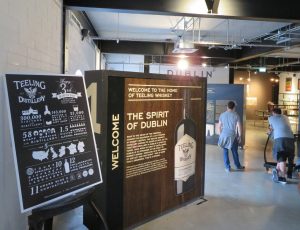
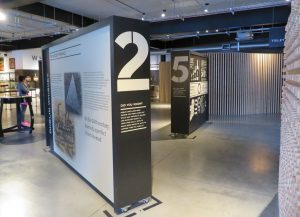

If you’re really into that piece, I’d suggest getting there at least 30 minutes early if you want to read everything. They’re pretty proud of being the first new distillery in Dublin in over 125 years, incorporating the “phoenix rising” into their logo (and not suggesting they shouldn’t be!) The tour guide ushered us from this space into a smaller room and talked with us briefly about the history of Irish whiskey, and how it fell from grace in part through their own stubbornness (not wanting to incorporate column stills over pot stills). They play a video of the Teeling’s talking about the distillery and their plans before bringing you into the working distillery.

If you’ve toured large distilleries before, this will definitely feel smaller. They step through the basics – starting with malted barley and pass around 3 canisters that you can touch/smell/taste the difference between un-malted barley, malted barley, and “Scottish” malted barley (heated with peat smoke, and what they were using during our visit). The barley is milled into flour and combined with water in a wet mill as it is passed to the lauter tun for heating and mashing. Several hours later the resulting wort is ready to be moved to their fermenters.  It starts in one of their two 15k liter wooden fermenters, and after a bit is moved to one of their four 30k liter stainless steel fermenters to complete fermentation.  This is the first I’ve heard of anyone moving the wort between different fermentation vessels, but Teeling is nothing if not innovative.

The two wooden fermenters were open for visitors to see what’s happening inside, with one fermenting away (the other they hadn’t yet added the yeast). They allow it to ferment over about 5 days until their wash (or ‘distiller’s beer’) is about 8% ABV. I asked about the type of yeast, as I’m always intrigued by how some distilleries place great emphasis on this (maintaining yeast strains for generations, or using different yeast strains to impart different flavors, or simply using industrial yeast with no provenance).
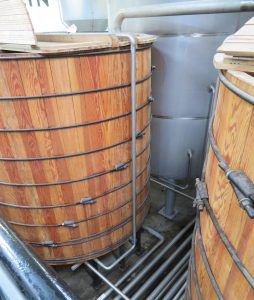
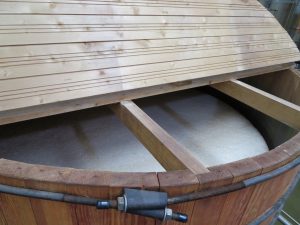
Our guide (Eimear) explained that they use a combination of traditional distiller’s yeast (the industrial standard at many distilleries) and a white wine yeast from South Africa which they found imparts some fruity notes to the spirit. She emphasized that the yeast doesn’t make a huge difference – that only 40% of the flavor comes from the process we see in the distillery (the rest from the barrel during maturation), but acknowledged it does have a subtle difference. Those of us who have tasted through all 10  recipes of Four Roses (where there are two mashbills, but 5 yeast strains) can attest that there is absolutely an impact from yeast, and I was impressed that our tour guide not only knew the answer to my question, but had some grasp on the impact it has on the final spirit – reflects well that they’re training their folks well and not just providing scripts to read.

After fermentation, the wash moves to the first of their three, handcrafted copper pot stills (made by Frilli in Sienna, Italy).  Each of the stills are named after Jack Teeling’s three daughters. The first 15k liter wash still (Alison) takes the wash up to a low-wine of about 30% ABV. This is moved to the second 10k liter intermediat still (Natalie), where a second distillation takes the spirit up to about 65% ABV. This is moved to the third 9k liter spirit still (Rebecca) whose third distillation of the spirit renders a product of about 84% ABV.
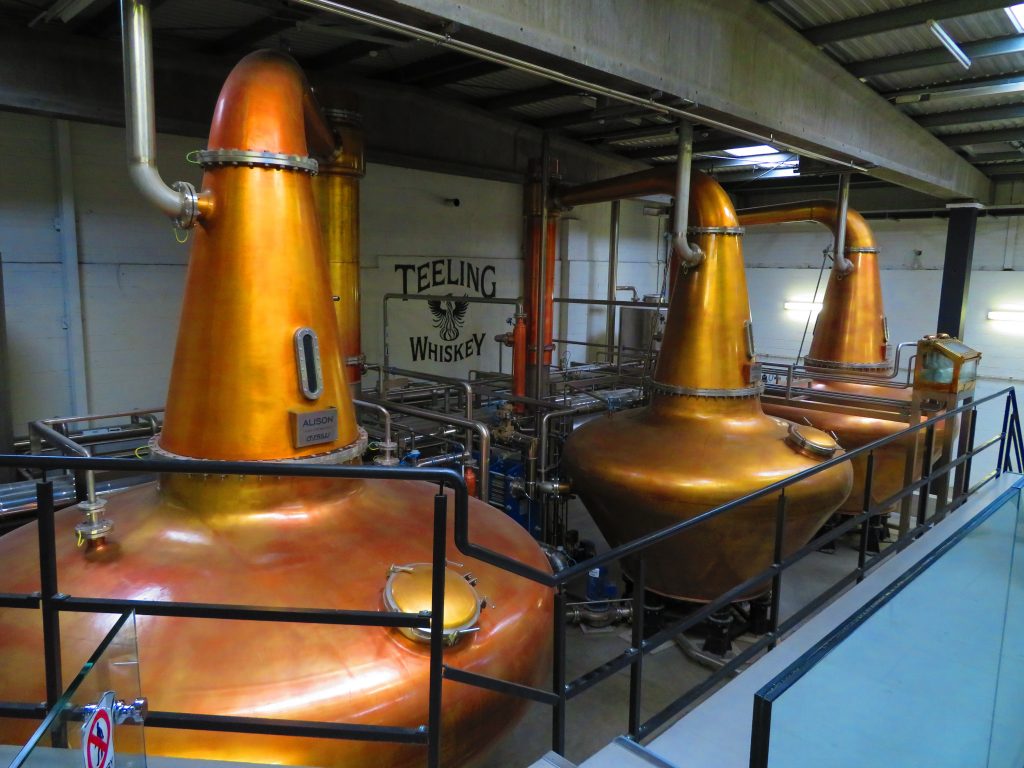
Currently they’re producing about 30k liters of spirit a week at the distillery, and it is matured off-site about an hour north. They do have a couple of barrels aging on-site – the first barrel filled at the distillery (which has a countdown clock on the vault for when it will reach the 3 years and one day age to be legally bottled as Irish whiskey, which would be on 10/24/2018). The other is the Zoey Teeling cask, which was filled on the day she was born. For maturation, they use casks which previously held bourbon, cabernet savignon, rum, sherry, and other wines/spirits. The climate in Ireland results in the angels being less greedy, losing only about 2% every year during maturation (versus 5% for bourbon in Kentucky).

Now for my favorite part – the tasting! They offered three different tasting options we we visited. The entry level was the Teeling Tasting (€15) and included the Teeling Small Batch along with a handcrafted whiskey cocktail. The middle option was the Teeling Trinity Tasting (€20), which included the Teeling Small Batch, Teeling Single Grain, and Teeling Single Malt. We opted for the top of the line tasting, the Teeling Single Malt Tasting (€30) which per the web-site includes: Teeling Single Malt, Vintage Single Malt, and Limited Edition Single Cask.  During our visit, the “Vintage Single Malt” we got was their Teeling Revival Volume V, and the “Limited Edition Single Cask” we got was a non-chill filtered, cask strength 9 yr single malt matured in Port – which is only available at the distillery.  While not listed on the web-site, we got a 4th tasting of Teeling Small Batch in a highball glass, which was a nice palate warm-up dram (and made it easier on the guide to have everyone start with that). I liked how they managed the different tastings – when you get your ticket they give you a wrist band which is a ribbon (not one of those printed sticker things that aims to pull at your arm hairs). When you arrive to the tasting room, they have different tables based on your wrist band. This allowed the guide to move between the tables and manage the three experiences nicely without half the group feeling like they were “missing out” on what the others had.

We’ve reviewed the Small Batch and Single Malt here previously. The Revival was quite nice, although I didn’t find it appreciably better than the Single Malt.  It is difficult to do a studied tasting in this type of environment (although their setup was one of the better I’d seen to try to provide for that).  But for me, at a price point of €120 vs €55, I wasn’t blown away with the Revival. It had a lovely, long finish, and my dad thought that was his favorite of the four we tried. For me, the 9 yr port was what I liked best.

As I shared in an earlier post, I was on a mission to find a bottle of whiskey under the specific criteria – and here, on the last full day of the tour – I’d yet to purchase a bottle.
Just a reminder of those criteria:
1. Something I could afford (wanted to stay under $200)
2. Something I absolutely loved.
3. Something I could not purchase back home.
4. Something non-chill filtered.
5. Something bottled at cask strength.
6. Something distilled/matured in Ireland.
I was delighted to find something that checked every box in this 9 yr port. For €100, I’d have something delicious that I loved and could share with family/friends back home. Being able to fill my own bottle was a nice added touch. I’ll post a more thorough review when I can spend more quality time with it 🙂
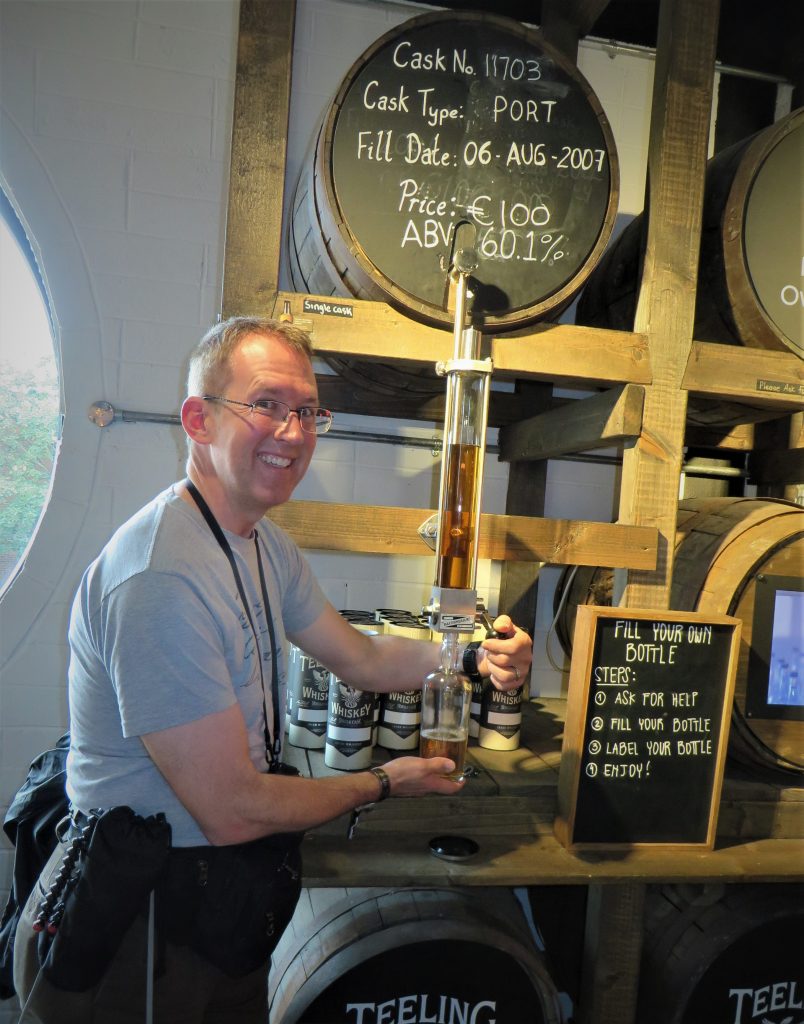
They did have another single cask you could fill yourself (a 20+ yr old rum cask for €350), and they have a bar next to the gift shop so you could order a pour before you buy (something the US distilleries should consider for those gift shop exclusives; many a one-off bottle I would have bought had I been able to try it first!)

If you’re in Dublin, I’d definitely recommend carving out a couple hours (the tour/tasting was 45 minutes to an hour) and swinging buy Teeling Whiskey Distillery.

Sláinte!
Gary

Teeling Whiskey Distillery Tour & Tasting Read More »

Jameson Distillery Bow St. Tour

Richard shared his experience just over six years ago here, and while it doesn’t sound like much has changed, I did want to highlight some of the differences and high points.

First key change from 2012 – the ticket was €13 and included 1 Jameson drink, while only a few select guests were asked to taste Jameson against an American whiskey (Jack Daniels) and a Scotch (Johnnie Walker). In 2018, the ticket is now €20, but everyone gets 1 Jameson drink AND the opportunity to taste the big three. Is it worth €20 (or $23 USD at the time we were there? To each their own (we weren’t disappointed, but I’ll share a tip to consider at the end!)

Another change from 2012; the only operational distillery offering public tours was Bushmills.  In 2018, there are two other distilleries right in Dublin:  Teeling Whiskey Distillery (began distilling in 2015) and Pearse Lyons Whiskey Distillery (which opened in July 2017, but Pearse Lyons began distilling a few years prior).  So if you’re looking for operational distillery tours, there are many more options today!  We did the Teeling Whiskey Distillery tour at the end of our trip, and I’ll share that experience later.

I agree with Richard that if you’re well versed in how whiskey is made, the tour is unlikely to break new ground.  This isn’t an operational distillery today, but I thought they did a good job as they tried to lay down now only the process, but make it sensory interactive.  First – you can get your free Jameson drink before OR after the tour.  Arriving early, we opted for before, and the choices were either neat, on the rocks, or in a cocktail (which I didn’t get the details of, but it involved ginger ale and my Dad thought it was pretty good).  These were all premade/prepoured, and you handed them your stub and took one.

After a short history lesson and a video, the guide takes you into a room where you have groups of 4 at a workstation where they’ll walk you through the whiskey making process.

These nifty workstations are in a fairly dark room, and each has focused lights above it that will highlight the area that the guide is talking about.  They start with malting, and highlight the tile in the middle (from a malting room floor), and have malted/unmalted barely that you can feel/smell (I guess taste, but who knows how many folks have fondled it; and the guide didn’t suggest this).  Then they move to distillation, where they have a spritzer bottle of spirit produced from a column still and a pot still, and invite you to spritz a long piece of paperboard (think ‘perfume sample’ in a department store) and smell the difference.  Then, they talk about the maturation process on the right, with bottles showing the color progression, and small boxes where you can uncork and smell the difference between a bourbon cask and a sherry cask.  All in all, I thought it was fairly well done – and for folks who aren’t familiar with whiskey making, probably fairly educational.

Then we get to the good part – the tasting.  Everyone gets 3 pours in front of them, and they’re labeled simply “Scotch Whiskey”, Jameson, “American Whiskey”.  He has everyone nose the Jameson first and talks about what most experience.  Then he has everyone take a wee sip just to prime the palate.  He has everyone then nose the American Whiskey and asks if folks can guess what it is (Jack Daniels).  Then he does the same with the Scotch Whiskey (Johnnie Walker – I thought Red but couldn’t swear to it).  This exercise was to highlight how Jameson compares to the best selling American Whiskey and Scotch Whisky on the planet.  We didn’t get any certificates or anything, but it was an enjoyable tasting.

After the tasting, you are customarily ushered through the gift shop, which had a nice assortment of stuff.

A little background – during our trip to Ireland, I was on a quest to find a bottle of whiskey that met certain criteria (listed in order; I was willing to give up the last couple)

1. Something I could afford (wanted to stay under $200)
2. Something I absolutely loved.
3. Something I could not purchase back home.
4. Something non-chill filtered.
5. Something bottled at cask strength.
6. Something distilled/matured in Ireland.

Hence, I was willing to bring home a fine, independent bottling of Scotch if I found one at a shop – provided I could try it first to check off that 2nd box. Nothing in the gift shop jumped out at me, but in the bar area, we noticed that they had a “fill your own bottle straight from the cask” setup which was intriguing. For €100, you could fill your own bottle of cask strength (I’d assume non-chill filtered) Jameson Black Barrel. That definitely checked some of the boxes, and when we asked if we could buy a sample at the bar, they obliged (which gave us a chance to check every box!) My Dad and I shared the pour (a standard 35 mL pour) and gradually added water as we went. The barrel was about 60% ABV, and my guess is that somewhere close to 50% it really hit its stride. Delicious for sure! My challenge was that while delicious, it wasn’t tremendously complex (and while non-age stated, it is likely 7 yrs old or so). Also, this was only the second full day in our 16 day trip. I made a note that if I didn’t find anything I liked better, I’d probably talk myself into a bottle of this.

So – what tip might I offer to those who are familiar enough with the whiskey making process? I’d still pay this a visit if you have the opportunity, but I’d skip the tour all together and go right to the bar and order a pour of the cask strength Black Barrel (be sure to specify that you want to try what they’re selling at that time!) You might be impressed enough to leave with a pretty unique bottle, and one you’ll hopefully enjoy.

Sláinte!
Gary

Jameson Distillery Bow St. Tour Read More »